
ASP.NET Core is a cross-platform, high-performance, open-source framework for building modern, cloud-based, internet connected applications. Using this framework you can build web applications, IoT applications etc. And also you can develop cross-platform applications.
It has better architecture and performance when compared to .NET framework. And also it has built–in dependency injection.
In this blog, we are going to explore how we can create ASP.NET Core Web API’s using Visual Studio 2019.
ASP.NET Core Web API’s using Visual Studio 2019
What’s an API?
Application Program Interface(API) is a set of definitions and protocols that allow technology products and services to communicate with each other. In simpler words, it’s just set of functions where you can call it by giving an request and it will perform a set of operations and it will return you a response.
API’s are like interface between the front–end and the back–end. They act like building blocks, allowing developers to build applications much faster.
How to create Web API’s using Visual Studio 2019
Step 1:
Download Visual Studio from visualstudio.com. There are three editions available,
- Community Edition – Free edition
- Professional Edition
- Enterprise Edition
And if you don’t have .NET Core installed, download from this link and install it in your respective machine.
Step 2:
After downloading, open Visual Studio and you will see an list of options like,
- Create a new project
- Open a local folder
- Open a project or solution
- Clone or check our code

Please select Create a new Project.
Step 3:
Then it will show you an list of project templates and it will have an search bar on the top. Search for ASP.NET Core web and please select ASP.NET Core Web Application template and click Next.

Step 4:
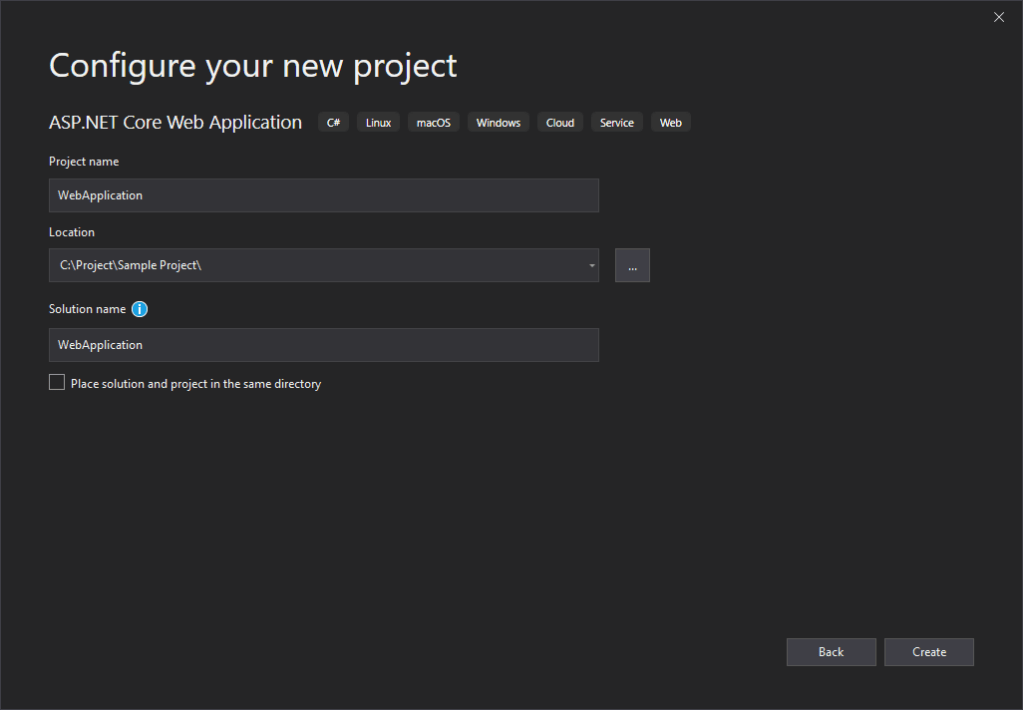
In the next window, please mention the Project name, Location and the Solution name and click Create.
Step 5:
Select API template and click Create.

Step 6:
And a project structure will be created, and you should be able to see a folder called Controllers. Basically a controller, has a list of API’s defined. In this sample we have an controller called WeatherForecastController.cs.
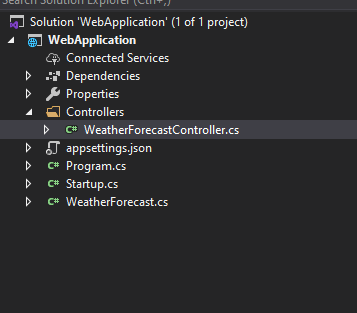
If you select that controller, we have and method called Get() which is an API to get the current weather.
[HttpGet]
public IEnumerable<WeatherForecast> Get()
{
    var rng = new Random();
    return Enumerable.Range(1, 5)
    .Select(index => new WeatherForecast
    {
	Date = DateTime.Now.AddDays(index),
	TemperatureC = rng.Next(-20, 55),
	Summary = Summaries[rng.Next(Summaries.Length)]
		  }).ToArray();
    }
}
If you see the above code snippet, it’s an GET API for getting the weather forecast. Basically you can create API’s for other methods such as POST, PUT, UPDATE ,DELETE etc.
Step 7:
If you run this application, by pressing F5 key it will open in the default browser with the following url,
https://localhost:44301/weatherforecastIt will give you an response,
[
   {
      "date":"2019-12-16T15:02:42.6098743+05:30",
      "temperatureC":30,
      "temperatureF":85,
      "summary":"Cool"
   },
   {
      "date":"2019-12-17T15:02:42.6109687+05:30",
      "temperatureC":42,
      "temperatureF":107,
      "summary":"Hot"
   },
   {
      "date":"2019-12-18T15:02:42.610971+05:30",
      "temperatureC":27,
      "temperatureF":80,
      "summary":"Freezing"
   },
   {
      "date":"2019-12-19T15:02:42.6109712+05:30",
      "temperatureC":13,
      "temperatureF":55,
      "summary":"Chilly"
   },
   {
      "date":"2019-12-20T15:02:42.6109714+05:30",
      "temperatureC":38,
      "temperatureF":100,
      "summary":"Cool"
   }
]
So we will just add another API to get the weather based upon a city.
Step 8:
We have created an API in the same weather controller, which will return “Climate is Cool” if the given city name is Coimbatore and if the given city name is Pollachi it will return as “Expecting Heavy Rains“.
[HttpGet("cityName")]
public string GetWeatherByCountryName(
               [FromQuery]string cityName)
{
     if (CityName.Equals("Coimbatore",
                          StringComparison.OrdinalIgnoreCase))
     {
         return "Climate is Cool";
     }
     return CityName.Equals("Pollachi")
	    ? "Expecting heavy rains"
	    : "Invalid Input";
}
So if you run this application and if you give the url like,
https://localhost/weatherforecast/coimbatoreIt will give you “Climate is cool”. So you see creating an API is as simple as it is of creating a function.
Conclusion
In this blog, we have covered how we can create ASP.NET Core Web API’s using Visual Studio 2019 and also we have a created an sample API. And if you want better readability of you API’s you can use Swagger.
To enable swagger in you application, visit this link
And also I have code sample in GitHub which I mentioned in this blog. Visit the repository if you have any doubts.
In our next blog, we will explore about how the .NET has been evolved.
Happy Coding!
Cheers! 🙂

Thanks ffor a great read
LikeLike